We're finally to the point where I can start the build. I'd ordered lumber and other supplies from the local building supply company. They arrived on a truck and were forklifted in to my garage. Sadly, that was a busy week at work for me, so I didn't get the build started right away. The sum total of my accomplishments for the first 5 days was to invert the stack of lumber as the pieces I'd need first were near the bottom (of course). When the weekend arrived, I could get started.
Weekend 1
The build begins with the floor. I'm following the general outline of the Backyard Observatories CJE1 plans, but making a few modifications. I started by digging out six holes for the posts on which the floor rests and the larger central hole for the pier. I dug them out by hand with a post hole digger (actually this was done quite a while before lumber arrived). With the rocky soil I have, this was a lot of work, but doable by just spending an hour or so on each of a few evenings after work.
For the pier, I read this thread on Cloud Nights for advice. I don't have a frost line to worry about, so the six support post holes are somewhere around 16-20 inches deep. That should give plenty of support. For the pier, I went as deep as I reasonably could, which turns out to be just over 3 feet. Below that, my post hole digger won't reach very well. The hole starts at the top at around 12-14 inches diameter, but tapers significantly toward the bottom where a few stubborn rocks prevented me from digging any more out.
I did not use the same strategy in the CJE1 plans to square up the floor. Their plans drop a 4x6 post vertically in each hole (to be cemented in once square), connect them together with rim boards and joists while tweaking the dimensions to make it square. I ended up not being able to get the right ground treatment 4x6 wood, so I'll have to use post bases embedded in the concrete to connect the wooden post to the ground. I opted to use a style of post bases which are embedded in the concrete as it sets (rather than ones drilled in later).
It took two days to work out exactly how to square things up properly. The first attempt was using some stands I rigged up out of scrap lumber and clamps to place the outer frame, but with the high winds I get here (20 mph sustained and 30-40 mpg gusts on the weekend I was doing this) kept knocking over my stands and the uneven ground made it hard to mate adjacent pieces properly. Instead I decided to eyeball the first post position and set it in concrete, then use that as a secure and stable reference and go from there. This worked much better.
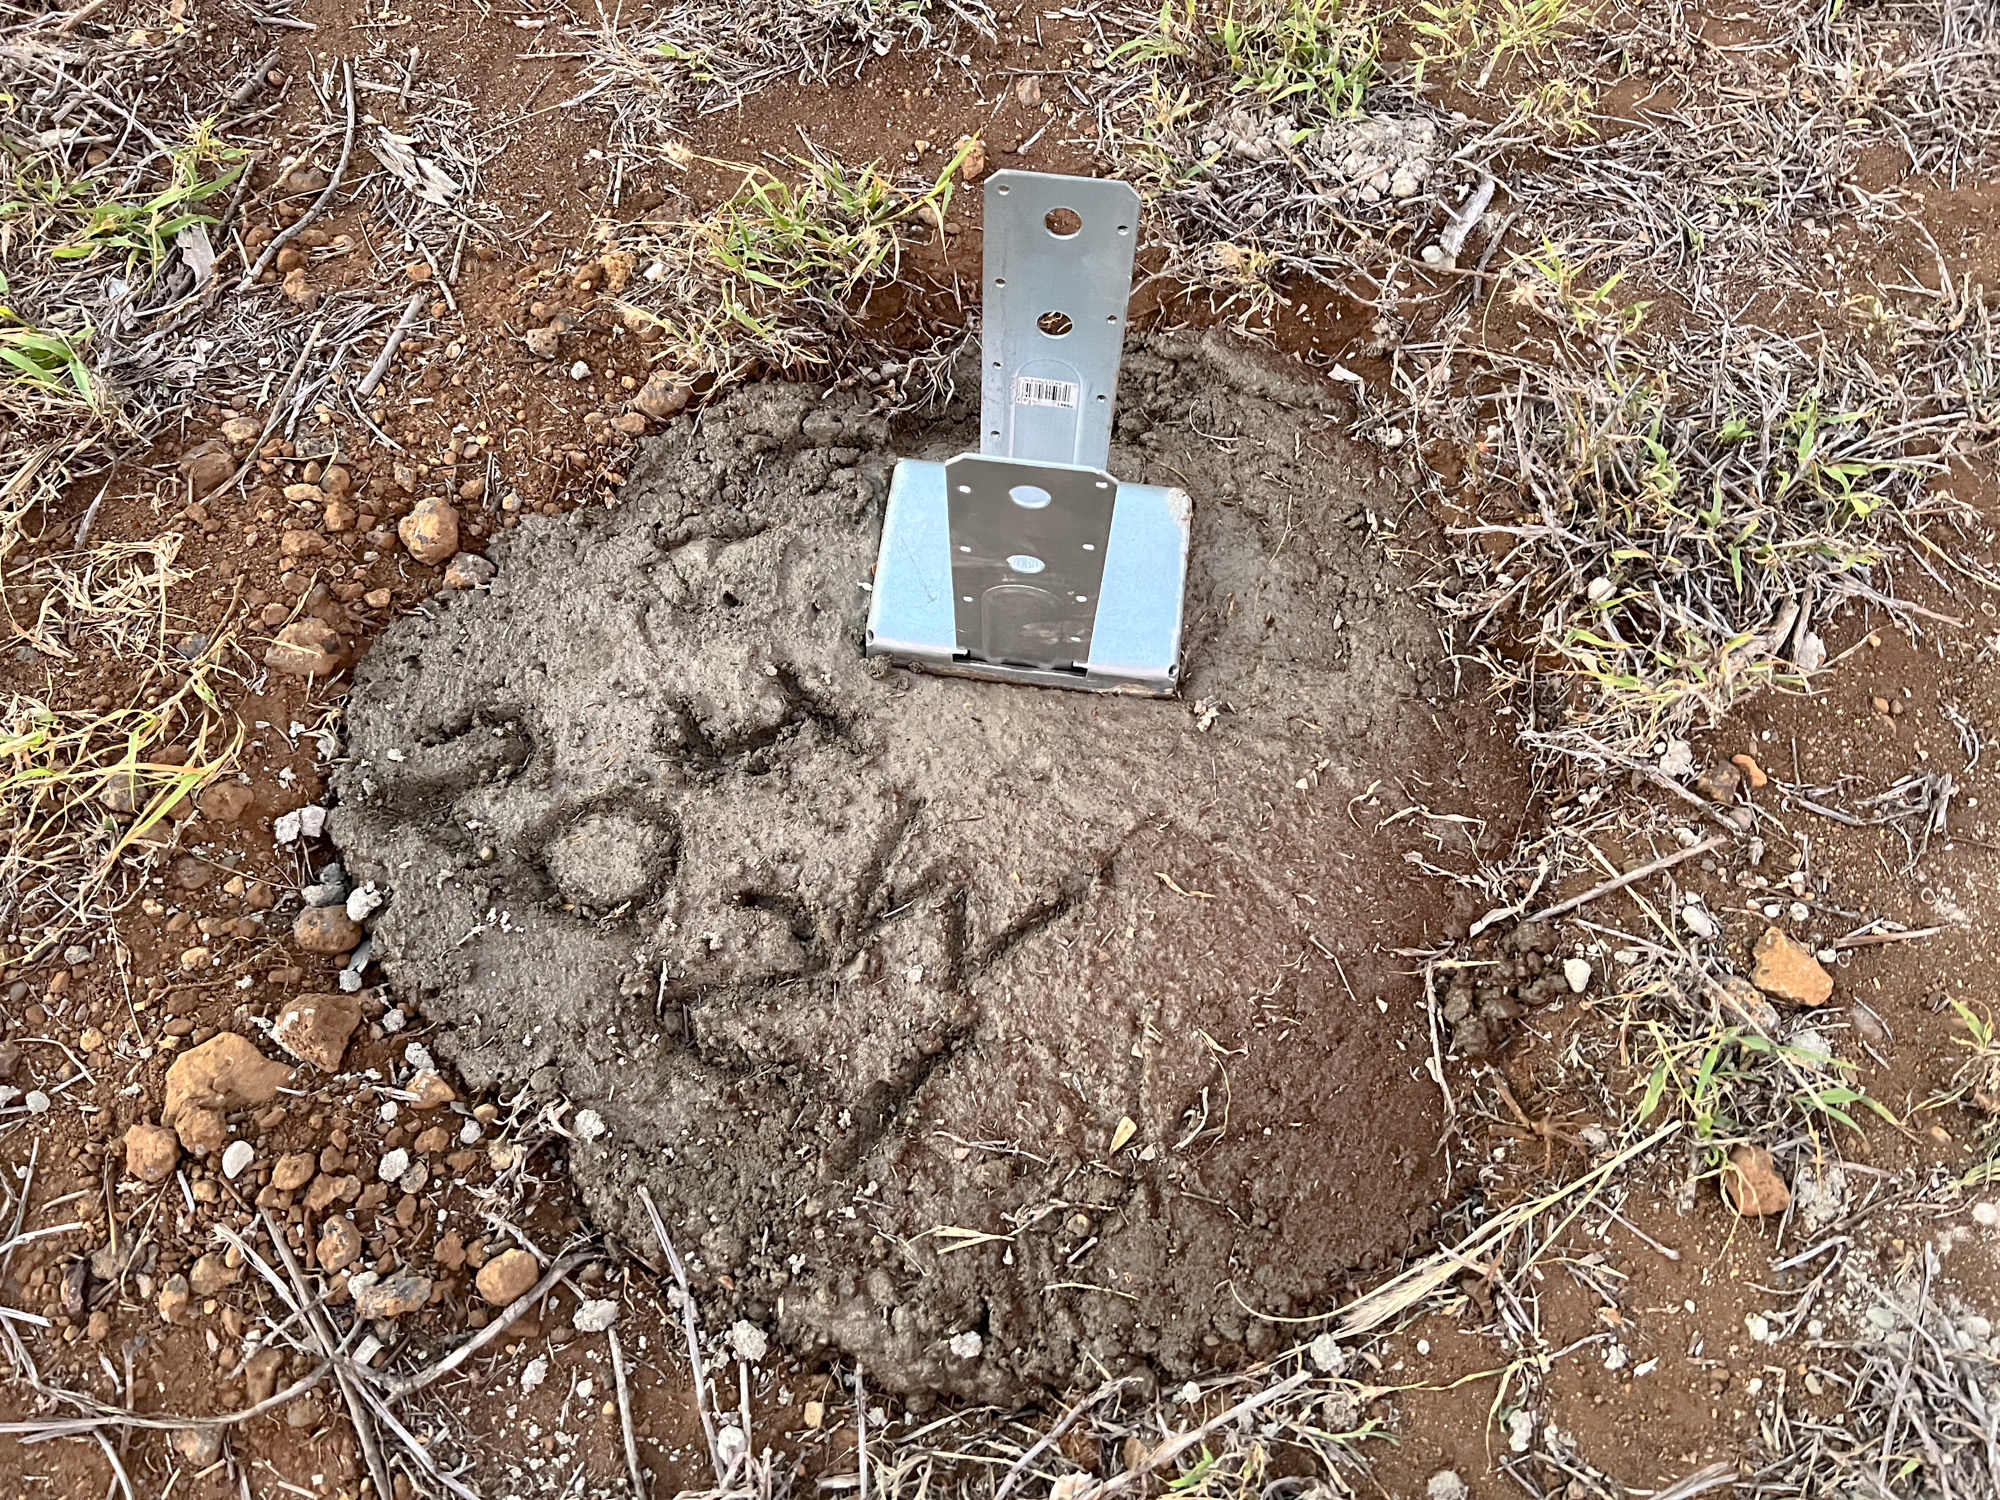
The first corner post of the observatory in place.
With one post in place (at the high corner), I could clamp up two 2x8s cut to length which will outline the floor, and level them by clamping them to stands made from scrap lumber. Now I have the correct length to the next corner posts, I just need to make sure the angle is square. I measured out a 3-4-5 foot triangle around the corner post, adjusted the angle until the measurements came together properly, and screwed down a 2x4 on the hypotenuse to lock in the angle.
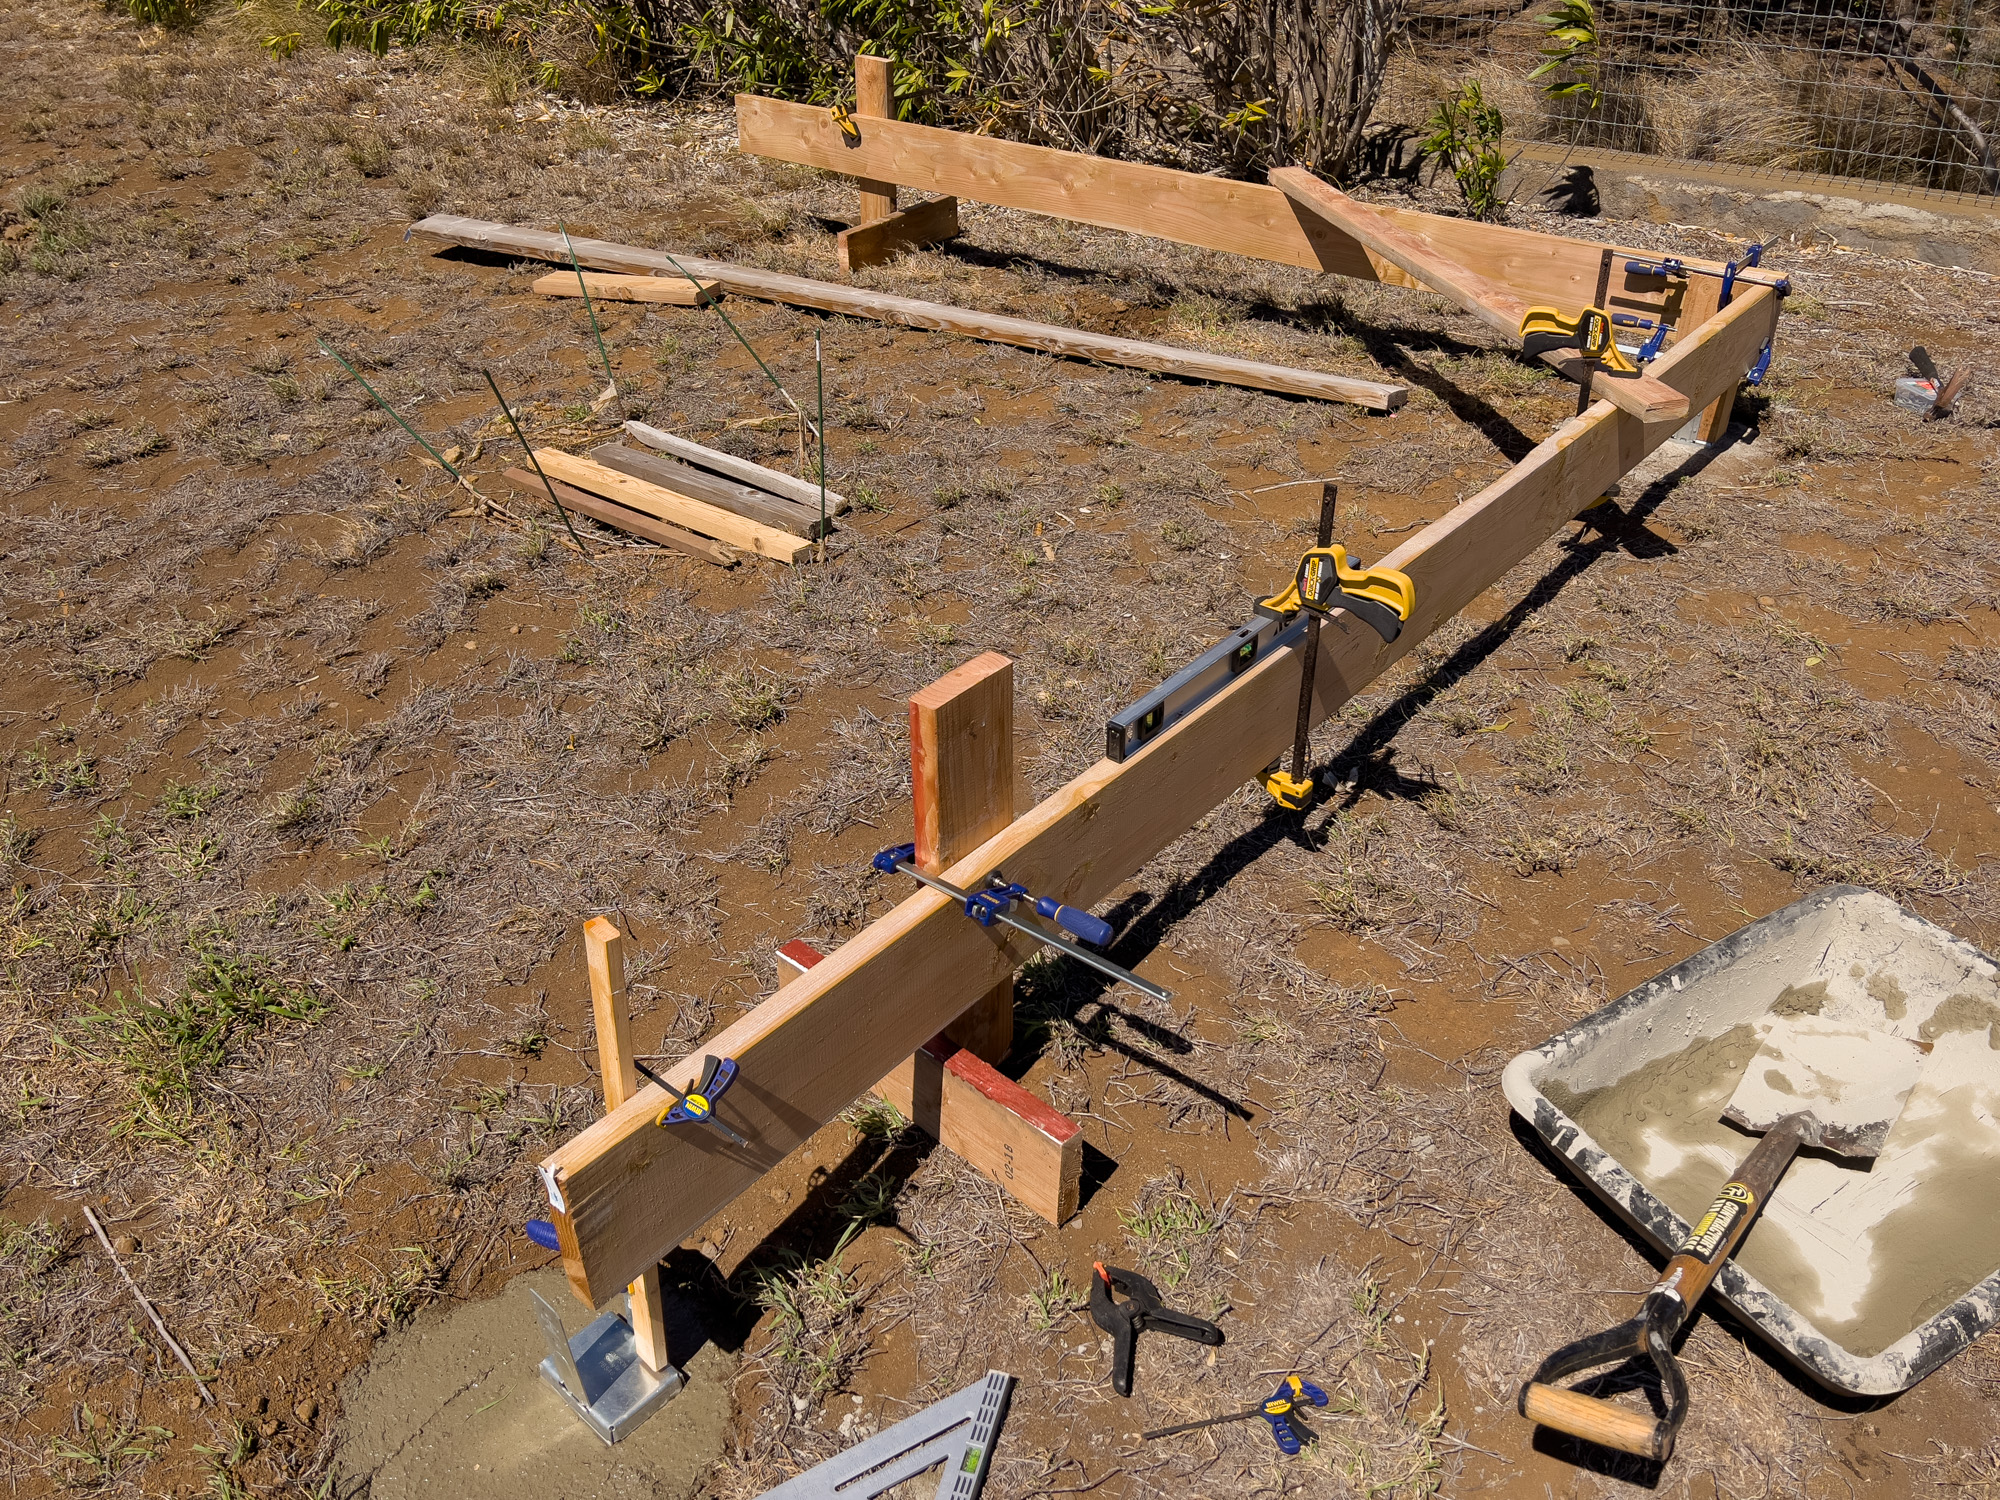
The first corner measured out for square and clamped in place.
Now I could pour concrete in the next two corner holes and place the post bases in them -- holding them in place relative to the 2x8s with some clamps and more scrap lumber. It may not look like much, but a day of work and I have 3 corner posts positioned. I'm waiting for the concrete to set before installing the posts and placing weight on them, so the rim boards are still help up by clamps.
I may have over sized the post holes since they will no longer contain the 4x6s, it took 10 60 lb. bags of concrete to get all 3 holes done. I was expecting to use half that much and my back can feel it. I'm mixing the concrete by hand which is hard work.
The most satisfying bit was measuring out the diagonal and finding out that I'd hit the expected distance based only on my 3-4-5 triangle.
Weekend 2
The next round of work really focussed on one big day. A friend of mine, Ben, had access to a concrete mixer and after mixing 600 lbs. of concrete by hand the week before, I was ready for the help. I'm glad I took the time to do those first three corners by hand since I wanted to make sure they were square, but mixing and puring the concrete for the last corner and the pier by hand, would have been a bit too much.
We checked the position of the final hole and used it to get our routine in place for mixing the concrete. A quick break while it set, then we went back out, set up scrap wood as braces for the central pier, trying to keep the desired target height, position, and make it level.
The concrete pour on the pier went pretty well. The rebar cage needed a little manual jiggling as it settled a bit too deep after we started pouring concrete over it, but we got it in to position just in time. The concrete was filled to near the top of the sonotube and I positioned the jig holding the J-bolts for the pier using my daytime reference for North which was a conveniently positioned tree (or perhaps inconvieniently positioned as I won't see Polaris directly from inside the observatory).
The following day was mostly a day of rest for me, but I did go out and nail in the end joist to close in the square base -- we'd kept it open to allow for wheelbarrow access. The base is in and (mostly) square. I think there's about 1/4-3/8" of inconsistency with all the measurements, but it is as close to square as I could make it.
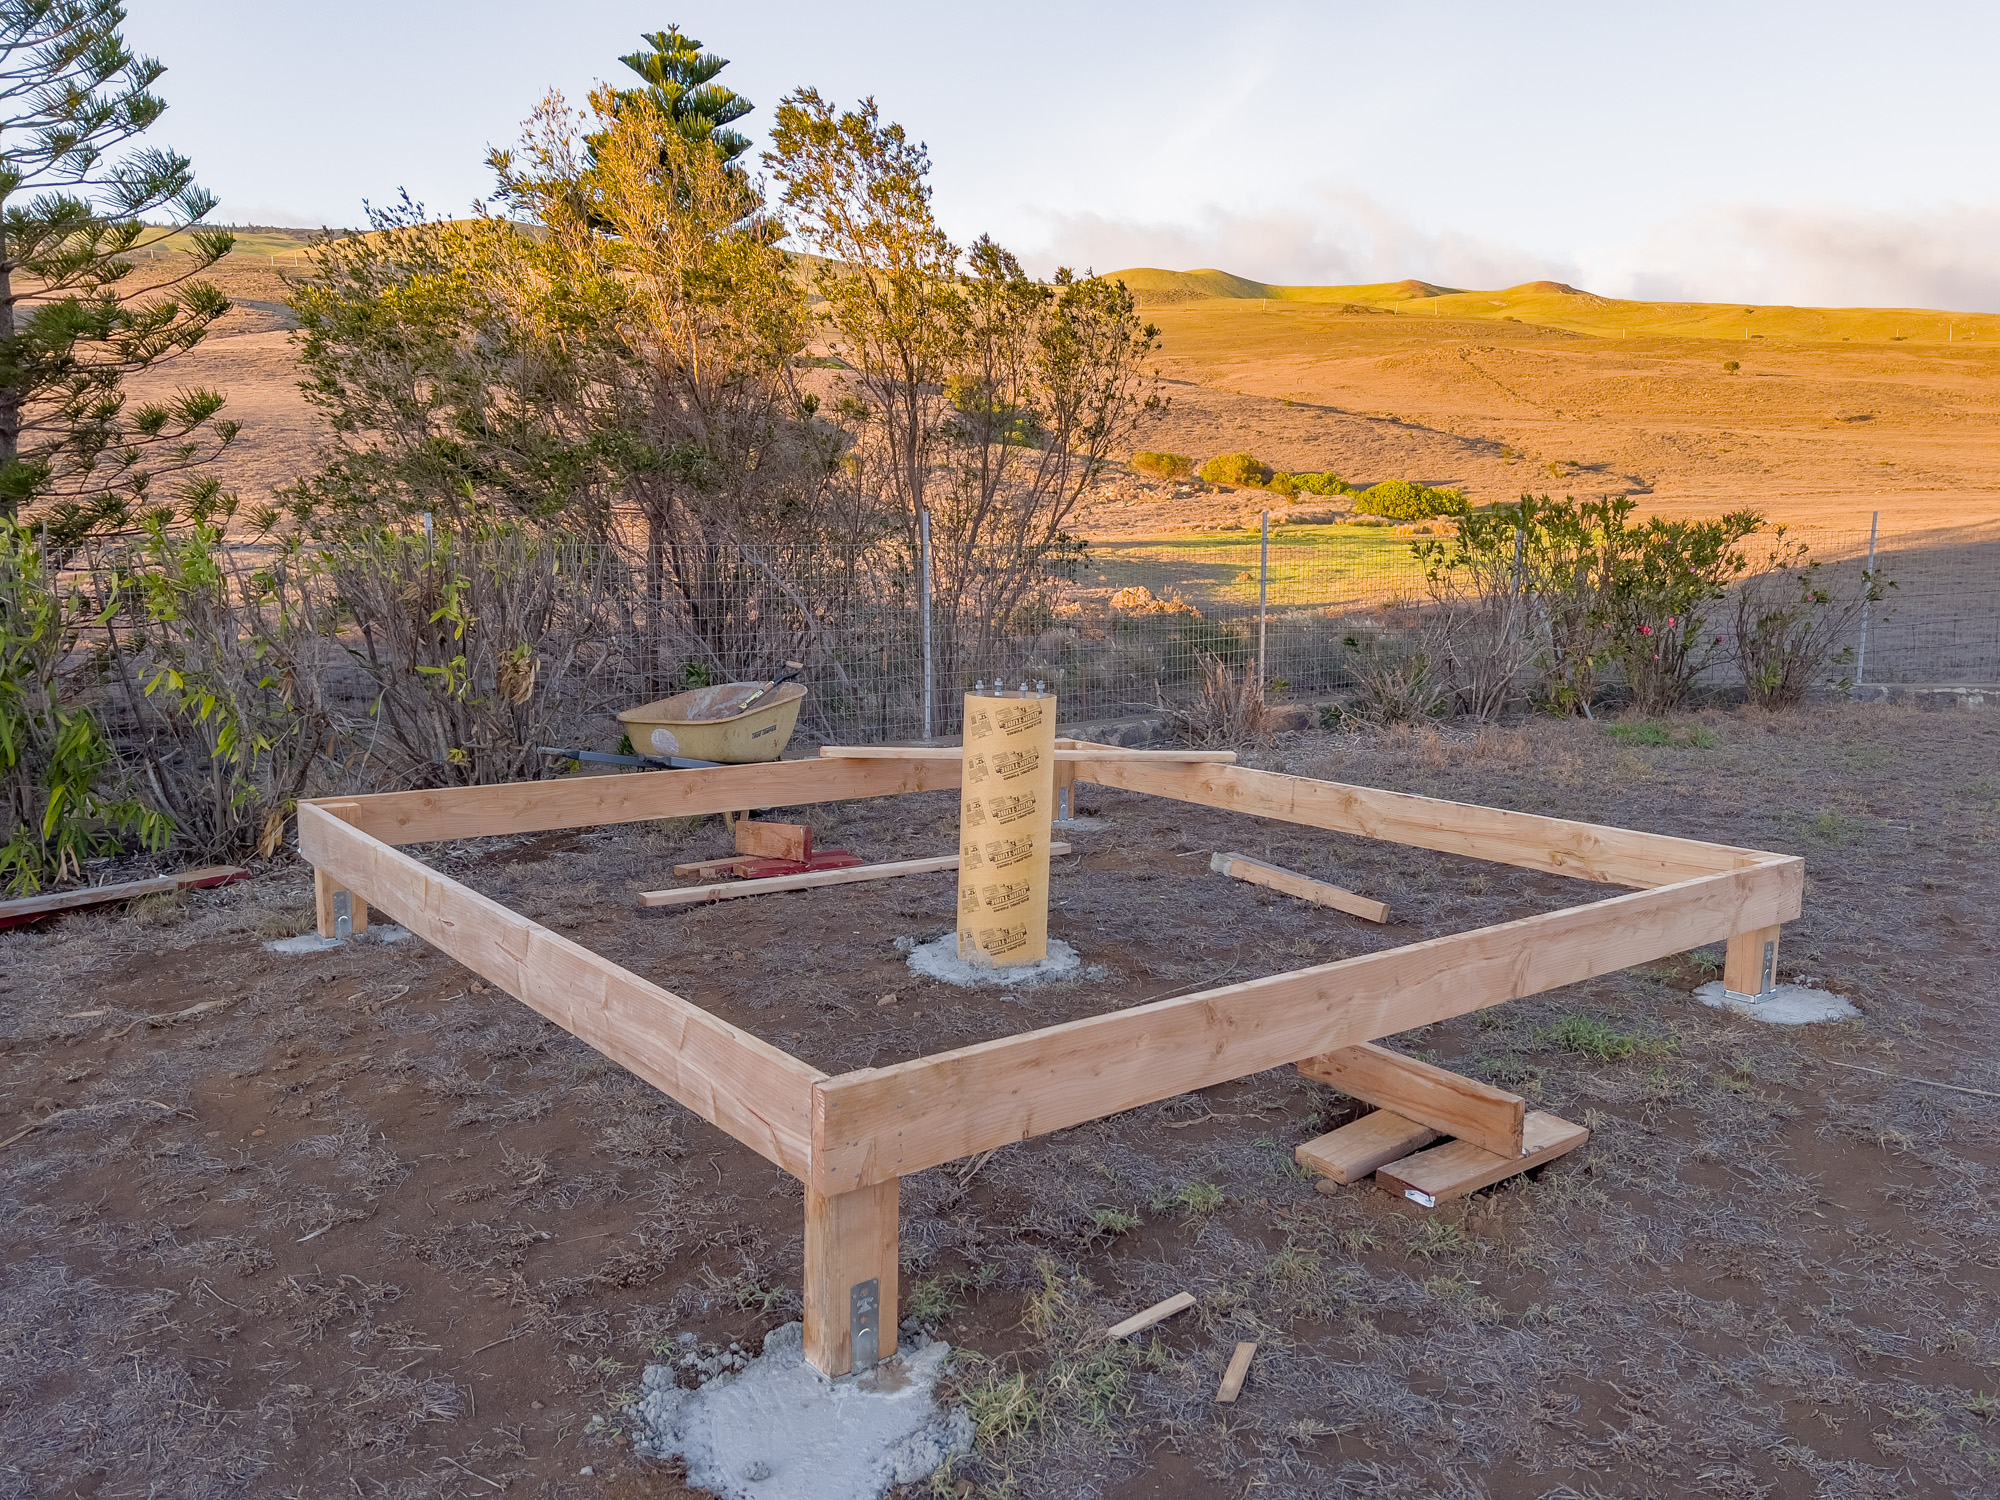
The outside frame of the floor and the pier are in place.
The next steps are to finalize the floor by adding some lag bolts for added strength, concrete in the last two post bases, and then add the internal joists.